Compass Cave Survey Software Logo - Bats, Compass and Night Sky
Custom Search

COMPASS For Windows
Compass Tour
New Features: 99-11
Cartography Tools
Live 3D Cave Images
On-line Help (New)
Written Description
History: 99-11
Testimonial Letters
Contact Author
Getting COMPASS
Getting Compass
Compass On A CD.
ESRI/ArcView Tools.
3D Glasses
Cave Data
Registration Information
Credit Card Reg.
Reg. Info/Forms
Printable Forms
Tutorials - (New)
Google Earth Overlay
Cartography Tools
Sketch Editor.
SVG Export
Inkscape SVG Maps
Illustrator SVG Maps
SVG Round Tripping
Adopting SVG Maps
Complex Plot Tutorials
Trouble Shoot CaveX
Exporting HPGL
Canvas Digital Map 
ArcView/ESRI
Italian Tutorial
DEM Tutorial
Links
Cave Related Links
User's Pages
User's Group
User Questions
Documents/White Papers
Compass File Formats
ArcView/ESRI
Finding Blunders
Finding Loops
Loop Closure
Least Squares
Survey Blunders
J. Halleck- On Loops
History/Philosophy
About The Author
COMPASS For DOS
DOS Compass Demos
DOS Compass Features
Magazine Review
MISC.
Other Products


<< Last

Top

Next >>

Open The Plot File

A. Open The Plot File. To perform the Merge, Adjust and Morphing process, you need the Plot file for the cave you are working. Make sure you have compiled it recently  (If you don't know how to do this, read the Compass Project Manager help file.)
We'll begin by loading that plot file. Run the Exporter and then select the "File ->Open" option from the menu bar. Select the plot file for the cave you are working with.

In this case we will be working with Fulford Cave, like we have done for the other tutorials. (There is a copy of the Fulford data in the Compass distribution.)

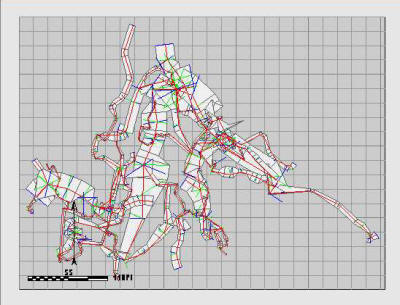
After you open the file, an image of the SVG map will appear in the center of the program. The image to the right show what the Fulford map looks like after it has been loaded.

<< Last

Top

Next >>

<< Home

Custom Search