|
COMPASS For
Windows |
|
|
|
Getting COMPASS
|
|
|
|
Download/Install Issues
|
|
|
|
Registration
Information |
|
|
|
Auxiliary Tools/Information |
|
|
|
Tutorials - (New) |
|
|
| Links |
|
|
|
Documents/White Papers |
|
|
|
COMPASS For DOS |
|
|
|
MISC. |
|
|
|
|
|
|
|
Color-By-Survey. This complex
option allows you to select individual surveys and color each
one a different color.
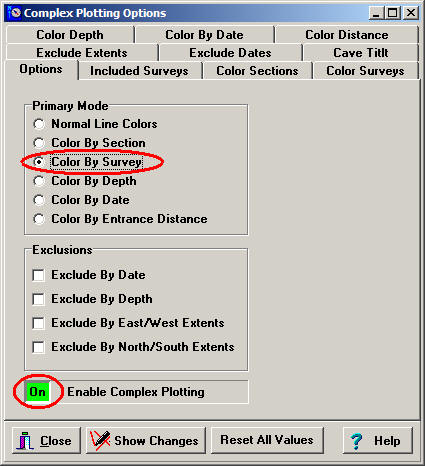
| 1. Complex Dialog Box. To use
the Complex Plotting options, bring up the Complex
Plotting Dialog Box by select the "Preference -> Complex
Plotting" option from the Viewer Menu Bar.
2.
Enable Complex Plotting. To enable Complex Plotting,
click on the Enable Complex Plotting box at the bottom
of the Options page. It should turn green when it is
enabled.
3. Color-By Survey. In this tutorial, we are
going to be choosing specific surveys and coloring them
individually. To do this, select the Color By Survey
option in the Primary Mode box.
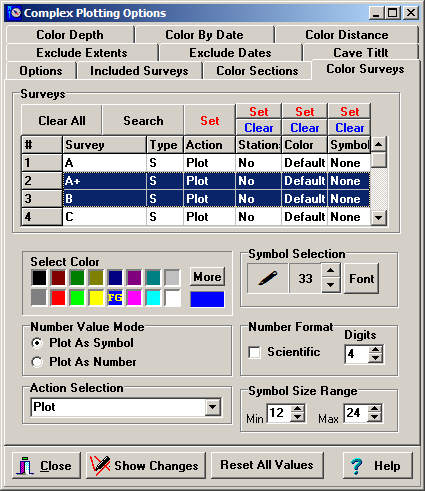
4. Selecting Surveys. Click on the "Color
Surveys tab. This will bring up the Color Survey page
which controls all the survey-coloring options |
 |
| The Color Surveys page displays a list
of all surveys in the cave. You can select an individual
survey by clicking on it wit the mouse cursor. You can
also drag the mouse or use the Shift Key to select
multiple surveys. 5. Changing Attributes. Each
column in the list displays attributes that apply to the
survey. The buttons above the column allow you to Set
attribute to a new value or Clear the value back to its
default value. The other boxes on the page control the
values of each attribute.
6. Color Attributes. In this case, we are
going to focus on setting the Colors of each survey. We
can choose any color for any survey. You choose the
color in the Select Color box below the list. |
|
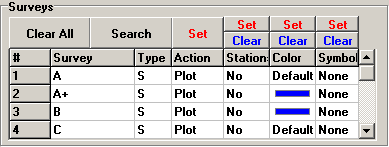
| In this case, we have
chosen the color blue. We have also selected two
surveys, the "A+" and the B survey. By clicking on the
Set Button, the indicated survey color changes from the
Default value to blue, and blue rectangle appears in the
list. |
|
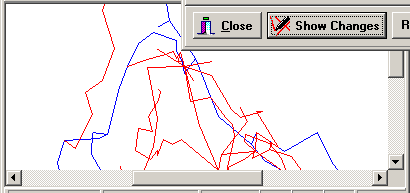
| 7. Display Changes. Before the changes
you've made will appear, you must press the "Show
Changes" button. As you can see from the display to the
right, some surveys are now color red (the default
color) and some are colored blue.
Every survey in the
cave can be colored a different color in this way. |
|
| Other attributes work the same way and in general,
all the Complex Plotting options work by selecting
combinations of options from the "Options" page and then
setting specific values in the other pages. At this
point in time, the complex options cannot be saved, so
you must capture images of the screen to preserve the
displays. |
|
|
|
| Sponsored Links |
|
|
| Sponsored Links |
|
|
| Sponsored
Links |
|
|
| Sponsored Links |
|
|
|

